Configuring Jira Project and Task Sync
Note
Currently only Jira Cloud is supported for Task Sync. While it is possible to synchronize items from On Premises Jira servers, it will require some customization of the API calls within the data flow.
The following videos walk-through the setup process covered in more detail below:
After setting up the dataflow, don't forget to setup the External System entry:
Note
There is no audio in these videos
| Data Flow | Query Name | Sync Table |
|---|---|---|
| Project | sensei_jira_project | sensei_jira_project |
| Task | sensei_jira_task_delta | sensei_jira_task_delta |
| Task | sensei_jira_assignment | sensei_jira_assignment |
To connect a Dataflow to your Jira Cloud instance, you can follow these steps:
- Navigate to https://make.powerapps.com and log in with your administrative account
- Ensure that you have selected the Power Apps Environment that contains your Sensei IQ installation
- From the Quick Launch menu, select to expand Data and then select Dataflows
If the sample Dataflows already exist,
- Locate the Dataflow that you wish to configure, open the ellipsis (…) menu and then select Edit (then continue with the steps below from 'Populate the SourceUrl...':
If the sample Dataflows do not exist,
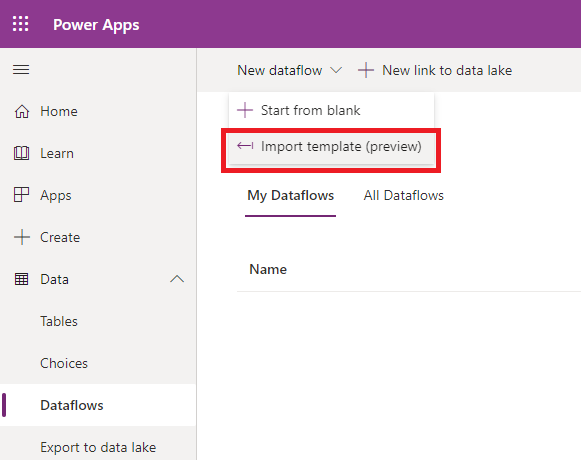
- Select New dataflow > Import template (Preview)
- Select the .pqt file that you wish to upload the Dataflow template for. (Links to the example Dataflows are in the Initial Setup section, above.)
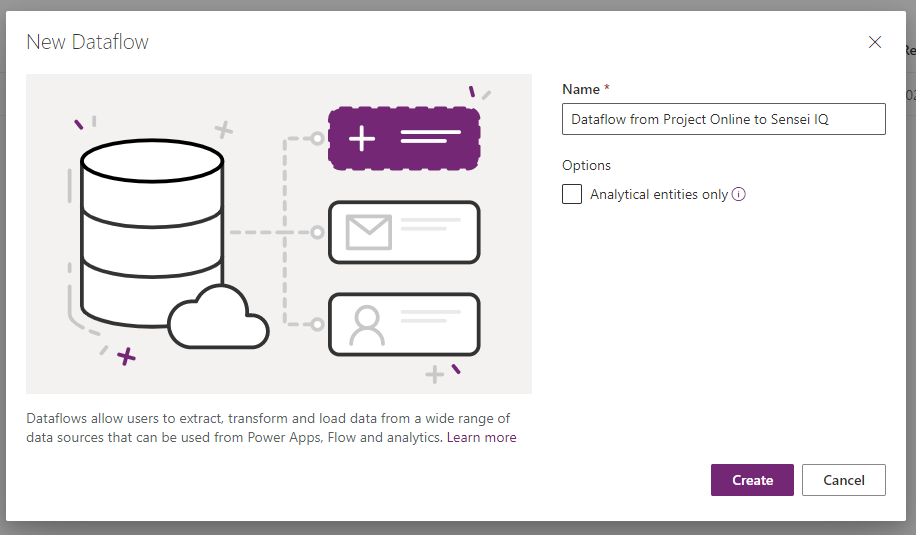
- Click Create
- Populate the following parameters
| Parameter | Description | Example |
|---|---|---|
| JiraUrl | The url of your Jira instance. | https://your-organization.atlassian.net/ |
| EmailAddress | The email address that you use to sign into Jira Core. | you@your-company.com |
| ApiToken | The API token that you created with your Jira account. See this help page from Atlassian on how to create an API Token. | 8yy15DMCYVzpAtY0fd1886fr |
| SenseiIQUrl | The url of the Power Apps environment that hosts Sensei IQ | https://orgabc123.crm.dynamics.com |
| PropertiesParameter | A comma delimited list of custom project properties to fetch. Only available if you are using the "advanced properties" template. | department,startDate,endDate,proposalCost,financialBenefit |
Note
Currently Jira Cloud doesn't provide a native interface for adding custom properties to your Jira projects. However, there are third party add-ins available via the Atlassian Marketplace that add this functionality.
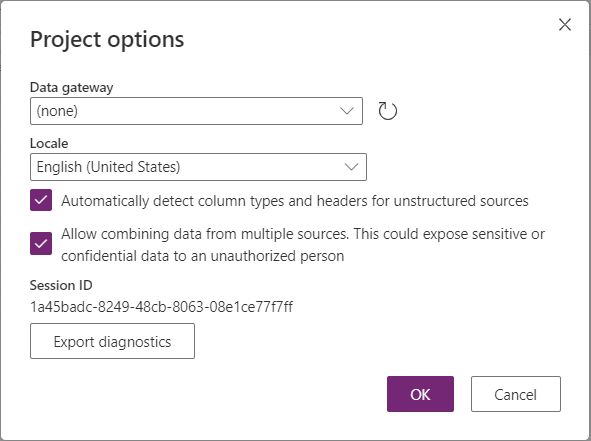
- Since Jira uses access tokens we need to enable a special check box. Select Optons from the ribbon bar (Project Options)
- Check 'Allow combining data from multiple sources'
- Select the dataset query from under the Queries heading, then select to Configure connection
- If there is no existing connection for your Dataflow, select 'Create new connection'
- Enter the following details:
| Column | Value |
|---|---|
| Connection name | {Enter a name for your connection (if not populated automatically)} |
| Authentication kind | Anonymous |
| Privacy level | None |
Note
Jira Core uses Basic Authentication for access to it's Web REST API, a feature that is not supported at the time of this writing by Dataflows. So long as you provide a correct Jira instance url and API token, the connection should be established even if this interface shows an error or you are prompted to re-enter the connection values upon subsequent edits of this Dataflow. If it does prompt you to re-enter authentication, make sure that you have checked 'Allow combining data from multiple sources' from the Project Options screen and that your access token setting is correct.
- Select Connect
- If successful, data from the external system will load to the preview in the Power Query window.
- Select the Next button in the bottom right of screen
- Ensure that the Parameters Queries are configured with the Load setting set to Do not load (this information does not need to logged anywhere).
Follow these steps for each remaining query in your dataflow:
- Select a Query a query from the left hand panel.
- Select Load to existing table. And select the correct destination table (see reference in this article)
- Check the 'Delete rows that no longer exist in the query output' checkbox.
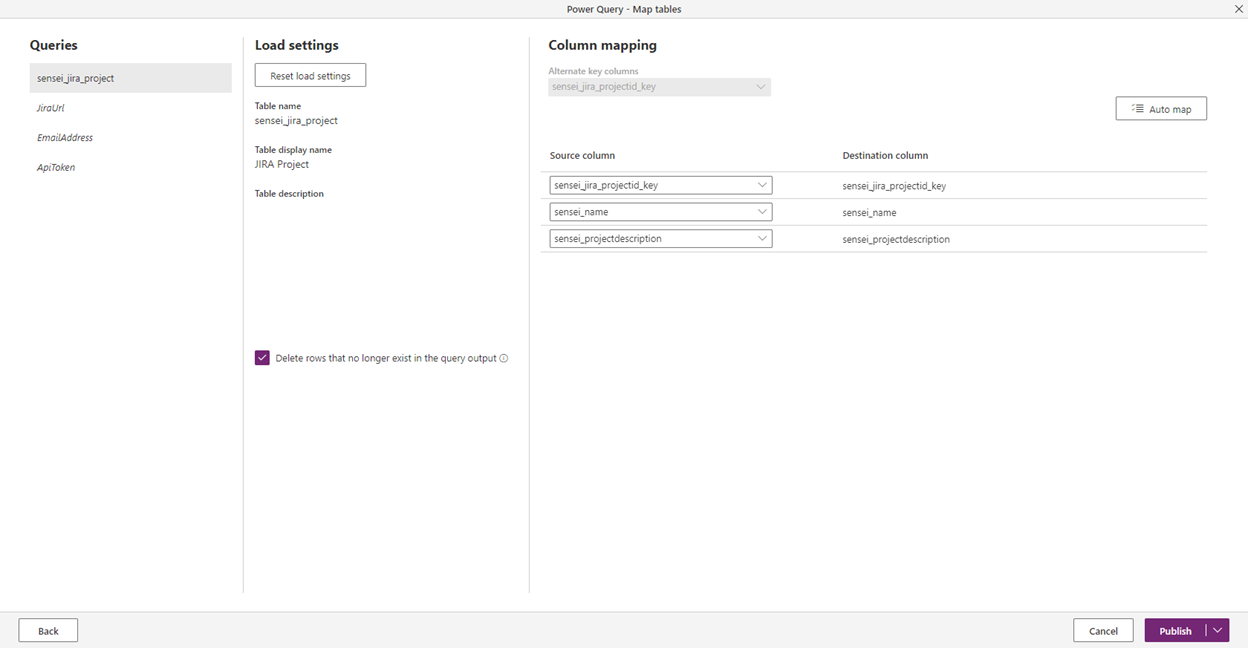
- In the right hand panel map all of the columns present. Click 'Auto Map' to complete this quickly.
- Select to run your Dataflow on a schedule. The frequency depends on both your business requirements as well as the volume of data that needs to be sent, particularly if you are synchronizing tasks. We recommend running dataflows once per day.
- Verify that your Dataflow runs successfully.
Use the screenshots below to verify your column mappings:
sensei_jira_project Dataflow Mapping:
- sensei_jira_task_delta Dataflow Mapping:
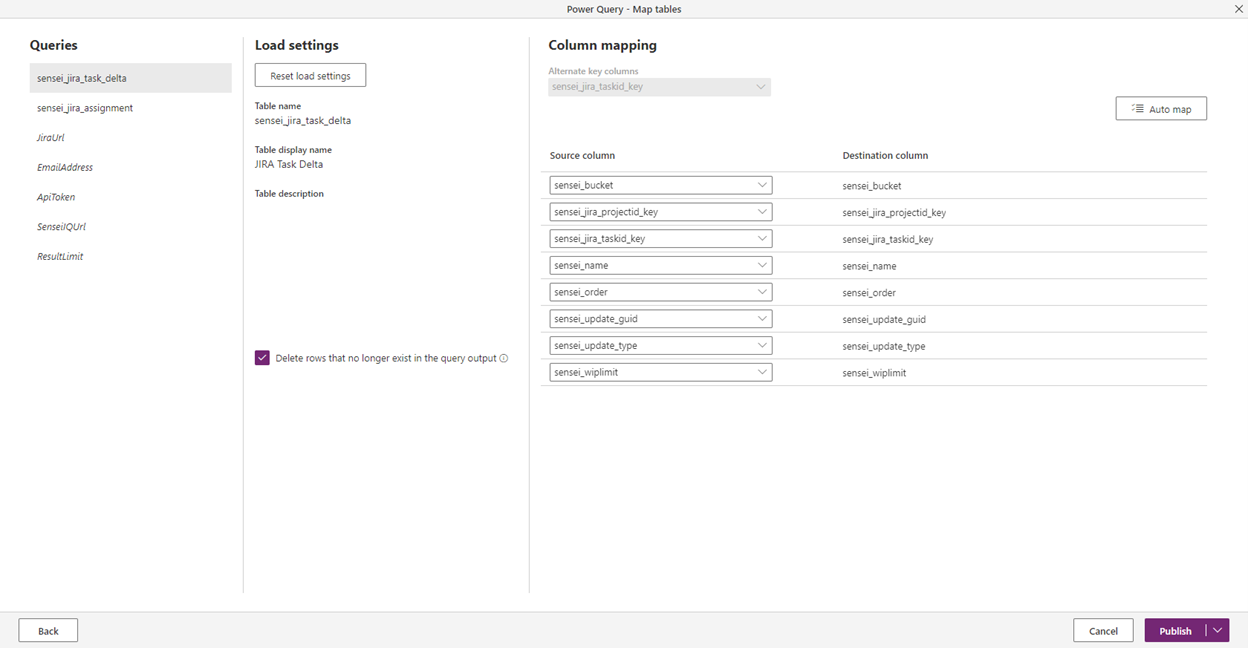
- sensei_jira_assignment Dataflow Mapping:
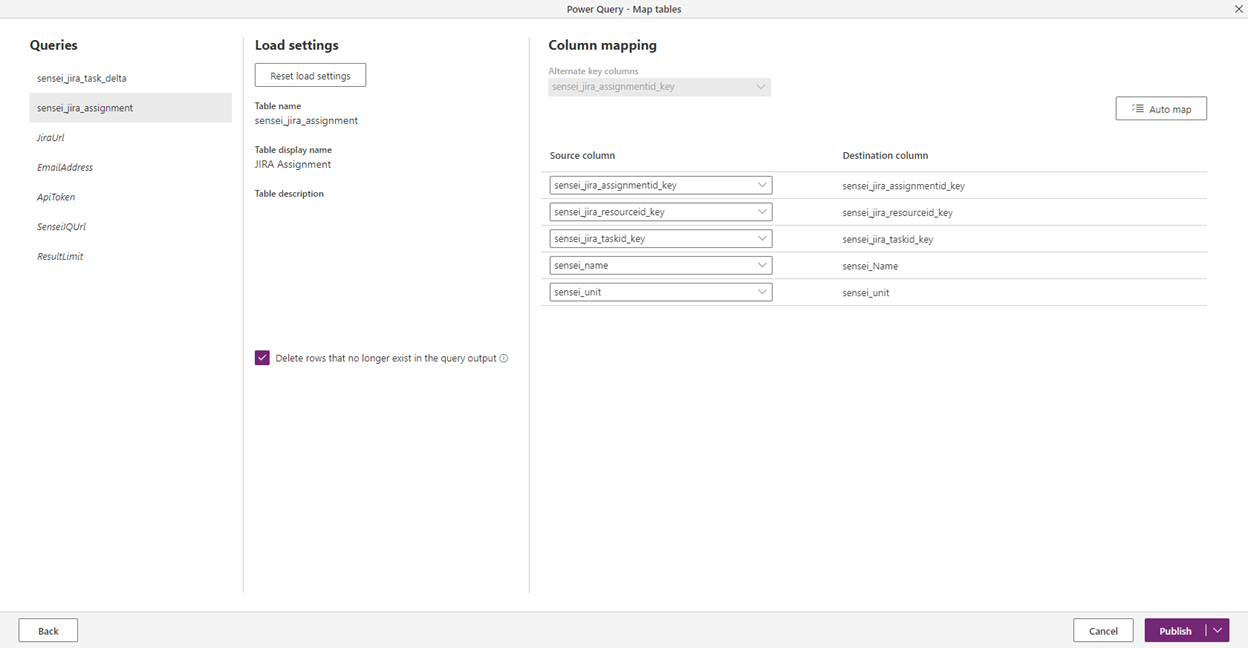
Note
If the Dataflow contains a query called Tasks_Raw, select 'Do not load' as the Load setting for that Query. (It is used internally to the Dataflow only).
Once the dataflow is running and populating the sync table, you're ready to complete the second part of the configuration process, which consists of the following steps:
- Enable the Disabled External System Record(s) by navigating to the 'Settings' area, then to 'External Systems'. Change the view to 'Inactive External Systems' and select the record for the system you wish to activate and click 'Activate' from the ribbon.

Once the record is active, review the column mappings by opening the External System record and navigate to the ‘Projects’ tab. Sensei has mapped the standard columns that we typically see our clients using in Project for the web and Project Online to columns that exist for a Sensei IQ Project. If there are new or additional columns that you require to be mapped, first, ensure that your data flow is configured to load the new column data into a new column on the target table, then create a new ‘Metadata Mapping’ for the column desired to a column in the sensei_project table. This will ensure that the data retrieved by the data flow will carry through to the Sensei IQ Project that is linked to the External Project.
Configure the ‘Project URL Pattern’ and optionally 'Task URL Pattern' to provide a direct link to the items in the external system. The “Pattern” for Jira projects needs to be updated with the instance name, eg: your-domain.atlassian.net
Use the tables below as a reference for the default configuration of each of the metadata mapping tables.
Project
Project Sync Table Name: sensei_jira_project
Project URL Pattern: https://YOURDOMAIN.atlassian.net/browse/{ID}
| Name | External Column Name | External Column Type |
|---|---|---|
| sensei_description | sensei_projectdescription | |
| sensei_externalprojectid | sensei_jira_projectid_key | ID |
| sensei_name | sensei_name | Name |
Task
Task Sync Table Name: sensei_jira_task
Task Sync Delta Table Name: sensei_jira_task_delta
Task URL Pattern: https://YOURDOMAIN.atlassian.net/browse/{ID}
| Name | External Column Name | External Column Type |
|---|---|---|
| sensei_bucket | sensei_bucket | Bucket |
| sensei_externalprojectid | sensei_jira_projectid_key | Parent Project ID |
| sensei_externaltaskid | sensei_jira_taskid_key | ID |
| sensei_name | sensei_name | Name |
| sensei_order | sensei_order | Bucket Order |
| sensei_wiplimit | sensei_wiplimit | Bucket WIP |
Assignment
Assignment Sync Table Name: sensei_jira_assignment
| Name | External Column Name | External Column Type |
|---|---|---|
| sensei_externalassignmentid | sensei_jira_assignmentid_key | ID |
| sensei_externalresourceid | sensei_jira_resourceid_key | Resource ID |
| sensei_externaltaskid | sensei_jira_taskid_key | Parent Task ID |
| sensei_name | sensei_name | Name |
| sensei_unit | sensei_unit |
