Configuring Project Online Project and Task Sync
The following videos walk-through the setup process covered in more detail below:
After setting up the dataflow, don't forget to setup the External System entry:
Note
There is no audio in these videos
| Data Flow | Query Name | Sync Table |
|---|---|---|
| Project | sensei_projectonline_project | sensei_projectonline_project |
| Task | sensei_projectonline_task_delta | sensei_projectonline_task_delta |
| Task | sensei_projectonline_assignments | sensei_projectonline_assignment |
To connect a Dataflow to your Project Online instance, you can follow these steps:
- Navigate to https://make.powerapps.com and log in with your administrative account
- Ensure that you have selected the Power Apps Environment that contains your Sensei IQ installation
- From the quick launch menu, select to expand Data and then select Dataflows
If the sample Dataflows already exist,
- Locate the Dataflow that you wish to configure, open the ellipsis (…) menu and then select Edit (then continue with the steps below from 'Populate the SourceUrl...':
If the sample Dataflows do not exist,
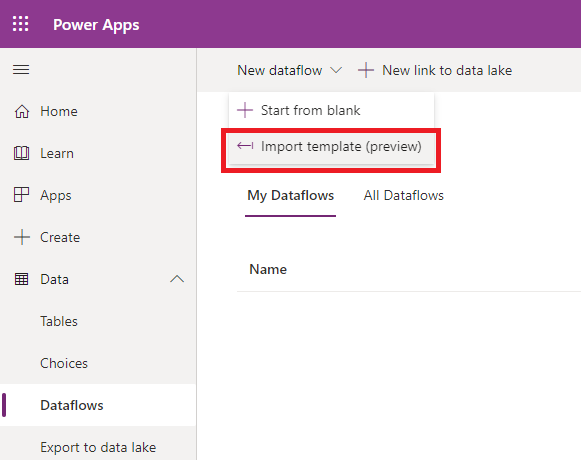
- Select New dataflow > Import template (Preview)
- Select the .pqt file that you wish to upload the Dataflow template for. (Links to the example Dataflows are in the Initial Setup section)
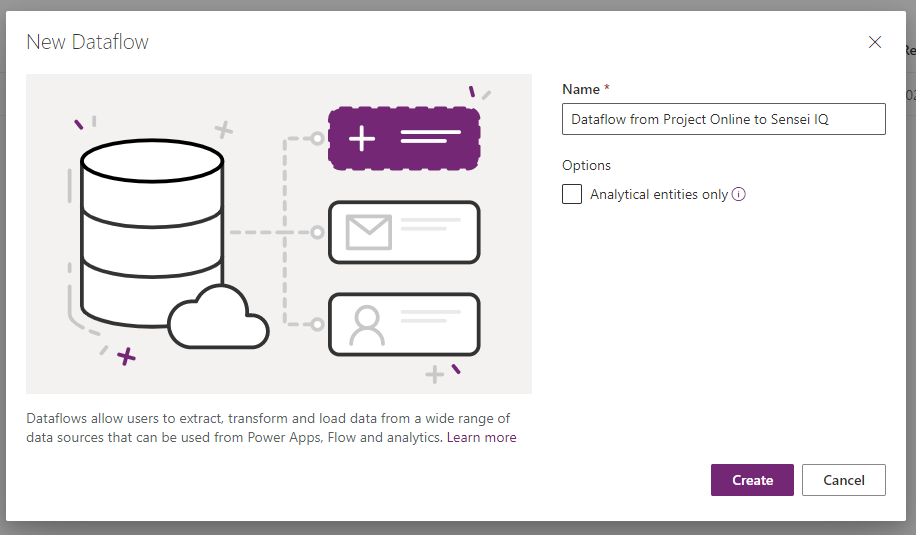
- Click Create
- Populate the PWAUrl parameter with the Url of your Project Web App (PWA) environment. For example: https://myorganisation.sharepoint.com/sites/pwa/
- Populate the SenseiIQUrl with the Url of your Sensei IQ Power Apps environment. For example: https://org1303d343.crm.dynamics.com
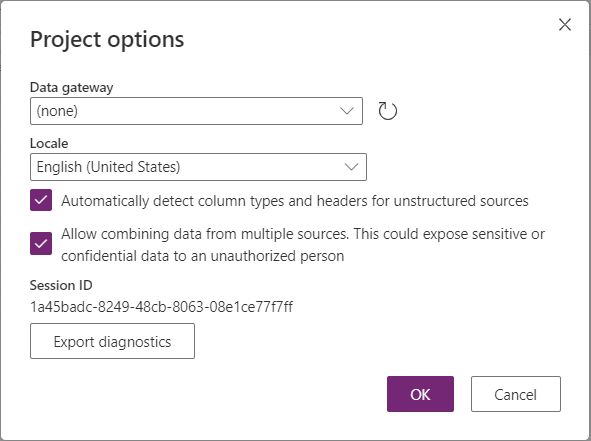
Note
In cases where you are combining data from multiple M365 tenants (i.e. Sensei IQ in one Microsoft tenant and PWA in another, please ensure that you select Options from the ribbon bar (Project Options) and check 'Allow combining data from multiple sources'
- Select the dataset query from under the Queries heading, then select to Configure connection
- If there is no existing connection for your Dataflow, select 'Create new connection'
- Enter the following details:
| Column | Value |
|---|---|
| Connection name | {Enter a name for your connection (if not populated automatically)} |
| Authentication kind | Organizational account |
| Privacy level | Organizational |
- Select Sign in and enter the credentials of an account which has access to all project data in the environment that wish to connect to.
Note
If you are using the same account to log in to the source environment as the one accessing this environment, still choose to enter the credentials afresh (rather than selecting the already logged in account) - for whatever reason, selecting the account (rather than re-entering the credentials) does not seem to have a high success rate in terms of the data flowing through upon creation of the connection.
- Select Connect
- If successful, data from the external system will load to the preview in the Power Query window.
- Select the Next button in the bottom right of screen
- Ensure that the Parameters Queries are configured with the Load setting set to Do not load (this information does not need to logged anywhere).
Follow these steps for each remaining query in your dataflow:
- Select a Query a query from the left hand panel.
- Select Load to existing table. And select the correct destination table (see reference in this article)
- Check the 'Delete rows that no longer exist in the query output' checkbox.
- In the right hand panel map all of the columns present. Click 'Auto Map' to complete this quickly.
- Select to run your Dataflow on a schedule. The frequency depends on both your business requirements as well as the volume of data that needs to be sent, particularly if you are synchronizing tasks. We recommend running dataflows once per day.
- Verify that your Dataflow runs successfully.
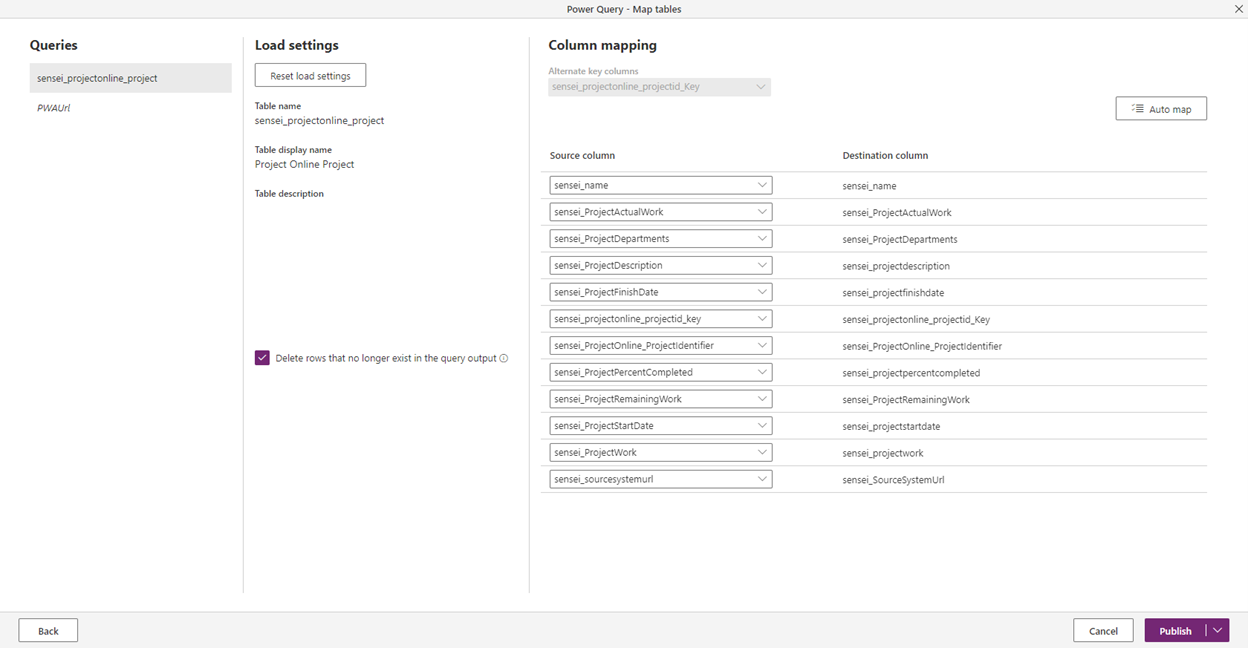
Use the screenshots below to verify your column mappings:
sensei_projectonline_project Dataflow Mapping:
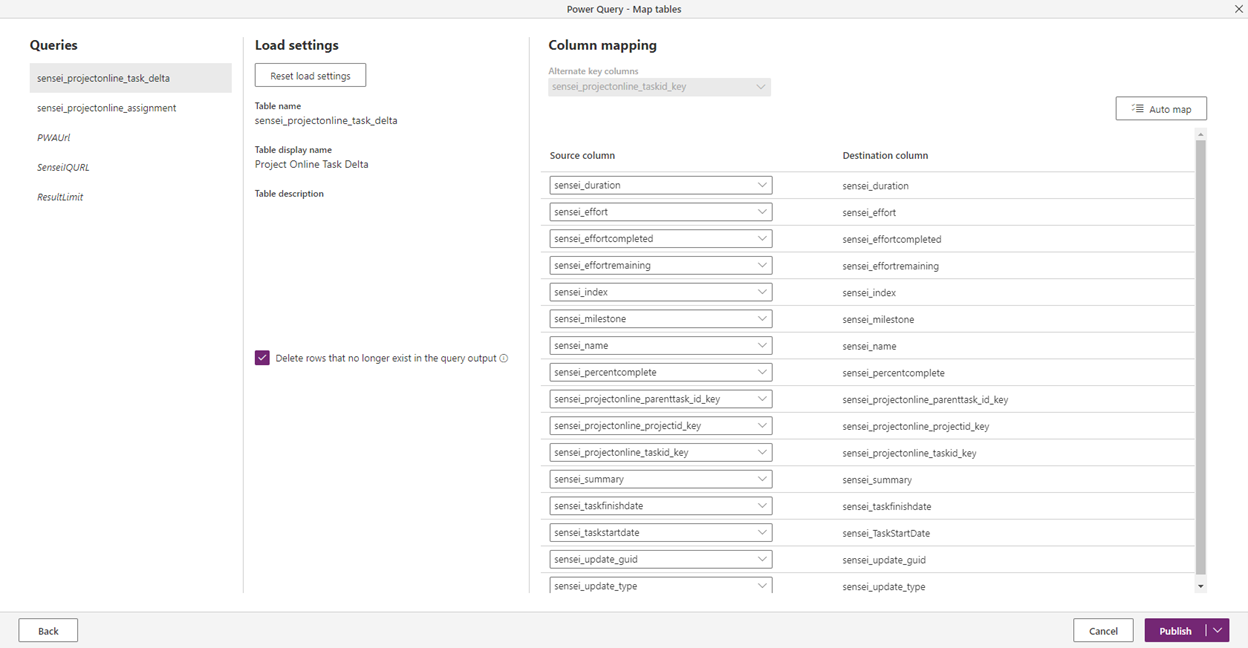
- sensei_projectonline_task_delta Dataflow Mapping:
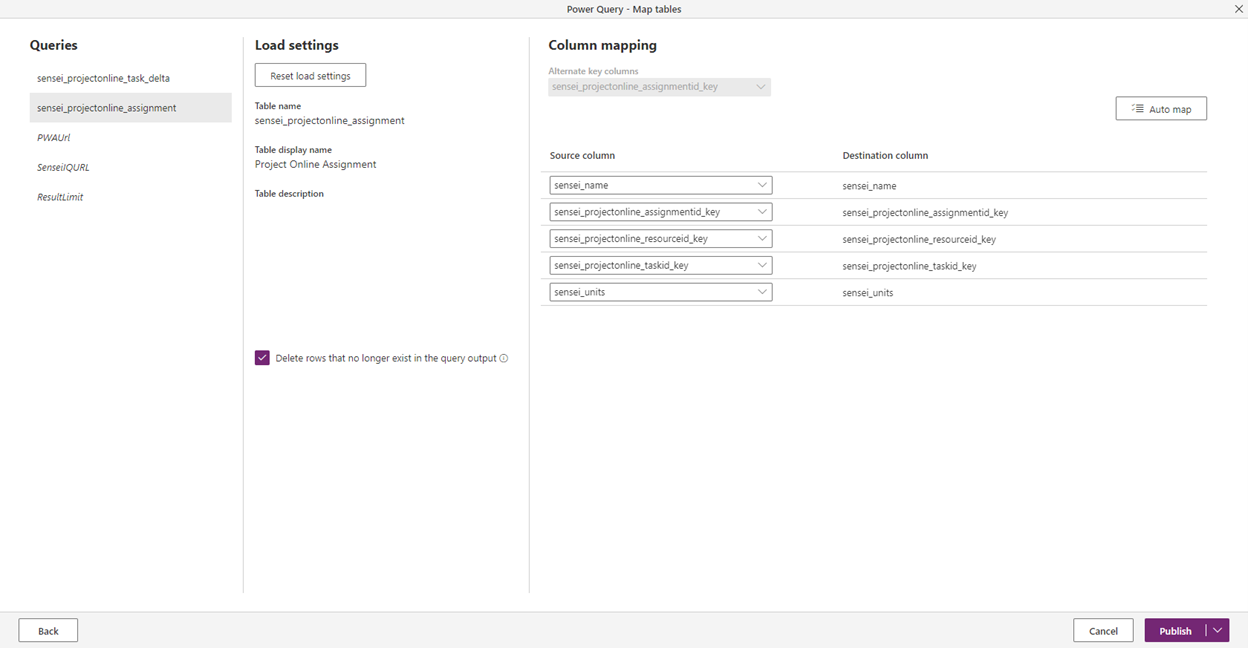
- sensei_projectonline_assignment Dataflow Mapping:
Note
If the Dataflow contains a query called Tasks_Raw, select 'Do not load' as the Load setting for that Query. (It is used internally to the Dataflow only).
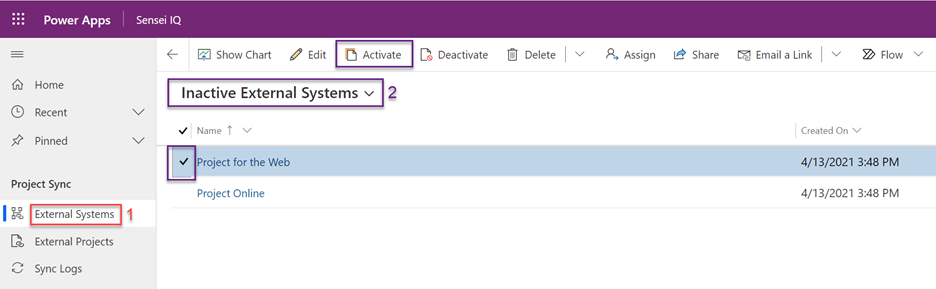
Once the dataflow is running and populating the sync tables, you're ready to complete the second part of the configuration process, which consists of the following steps:
- Enable the Disabled External System Record(s) by navigating to the 'Settings' area, then to 'External Systems'. Change the view to 'Inactive External Systems' and select the record for the system you wish to activate and click 'Activate' from the ribbon.
Once the record is active, review the column mappings by opening the External System record and navigate to the ‘Projects’ tab. Sensei has mapped the standard columns that we typically see our clients using in Project for the web and Project Online to columns that exist for a Sensei IQ Project. If there are new or additional columns that you require to be mapped, first, ensure that your data flow is configured to load the new column data into a new column on the target table, then create a new ‘Metadata Mapping’ for the column desired to a column in the sensei_project table. This will ensure that the data retrieved by the data flow will carry through to the Sensei IQ Project that is linked to the External Project.
Configure the ‘Project URL Pattern’ to provide a direct link to the project in the external system. The “Pattern” for Project Online projects needs to be updated with the org name and optionally PWA name as follows: https://m365x608009.sharepoint.com/sites/pwa/Project%20Detail%20Pages/Schedule.aspx?ProjUid={ID}&ret=0 where the text above would be replaced with your organization name and PWA name.

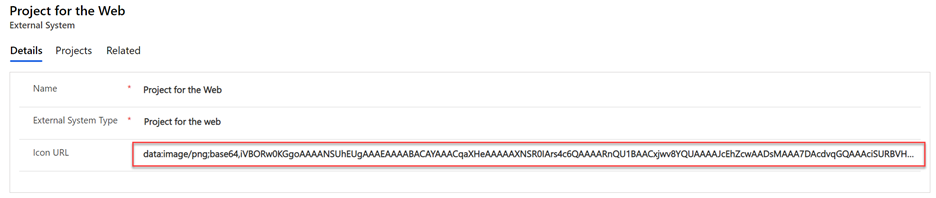
- Finally, on the ‘Details’ tab of the ‘External Project’ record, there is a ‘Icon URL’ column. This displays the base64 encoded icon image that represents this type of external project in the External Project selector on the sensei_project form and also in the Power BI Insights reports. It shows what system the external project record originated from. The values for these ‘Icon URL’s are configured correctly for Project for the web and Project Online projects, however, if you are setting up a different type of system or want to change the icon for whatever reason, please enter a new base64 encoded icon image URL into this column.
Jump to: Icon URL Reference
Use the tables below as a reference for the default configuration of each of the metadata mapping tables.
Project
Project Sync Table Name: sensei_projectonline_project
Project URL Pattern: https://TENANTNAME.sharepoint.com/sites/PWANAME/Project%20Detail%20Pages/Schedule.aspx?ProjUid={ID}&ret=0
| Name | External Column Name | External Column Type |
|---|---|---|
| ID | Sensei_projectonline_projectid_key | ID |
| sensei_effortcompleted | sensei_projectactualwork | |
| sensei_effortremaining | sensei_projectremainingwork | |
| sensei_efforttotal | sensei_projectwork | |
| sensei_name | sensei_name | Name |
| sensei_percentcomplete | sensei_projectpercentcompleted | |
| sensei_projectfinish | sensei_projectfinishdate | |
| sensei_projectstart | sensei_projectstartdate | |
| sensei_proposedstart | sensei_projectstartdate |
Task
Task Sync Table Name: sensei_projectonline_task
Task Sync Delta Table Name: sensei_projectonline_task_delta
Task URL Pattern: https://TENANTNAME.sharepoint.com/sites/PWANAME/Project%20Detail%20Pages/Schedule.aspx?ProjUid={ID}&ret=0
| Name | External Column Name | External Column Type |
|---|---|---|
| sensei_duration | sensei_duration | |
| sensei_effort | sensei_effort | |
| sensei_effortcompleted | sensei_effortcompleted | |
| sensei_effortremainingoverride | sensei_effortremaining | |
| sensei_externalparenttaskid | sensei_projectonline_parenttask_id_key | Parent Task ID |
| sensei_externalprojectid | sensei_projectonline_projectid_key | Parent Project ID |
| sensei_externaltaskid | sensei_projectonline_taskid_key | ID |
| sensei_index | sensei_index | |
| sensei_milestone | sensei_milestone | Is Milestone |
| sensei_name | sensei_name | Name |
| sensei_percentcomplete | sensei_percentcomplete | |
| sensei_summary | sensei_summary | |
| sensei_taskfinish | sensei_taskfinishdate | |
| sensei_taskstart | sensei_taskstartdate |
Assignment
Assignment Sync Table Name: sensei_projectonline_assignment
| Name | External Column Name | External Column Type |
|---|---|---|
| sensei_externalassignmentid | sensei_projectonline_assignmentid_key | ID |
| sensei_externalresourceid | sensei_projectonline_resourceid_key | Resource ID |
| sensei_externaltaskid | sensei_projectonline_taskid_key | Parent Task ID |
| sensei_name | sensei_name | Name |
| sensei_unit | sensei_units |
Modifying the Standard Task Sync Dataflow Templates to Include Custom Task Attributes
Frequently, our clients have a requirement to sync over additional task attributes from the source execution tool system into Sensei IQ. This might be additional metadata about the task like a "Task Category" or "Task Cost Type" as an example. To do this successfully, please ensure you follow the steps below (in the images, the steps that require modification are shown in red boxes, and the specific fields custom to our example are shown in purple.):
- For a project online external system where a new attribute needs to be synced, ensure that your custom column has been added to the following tables:
- sensei_task
- sensei_projectonline_task
- sensei_projectonline_task_delta
- Ensure that you have created an additional metadata mapping for the "Tasks" tab in the Project Online External System configuration.
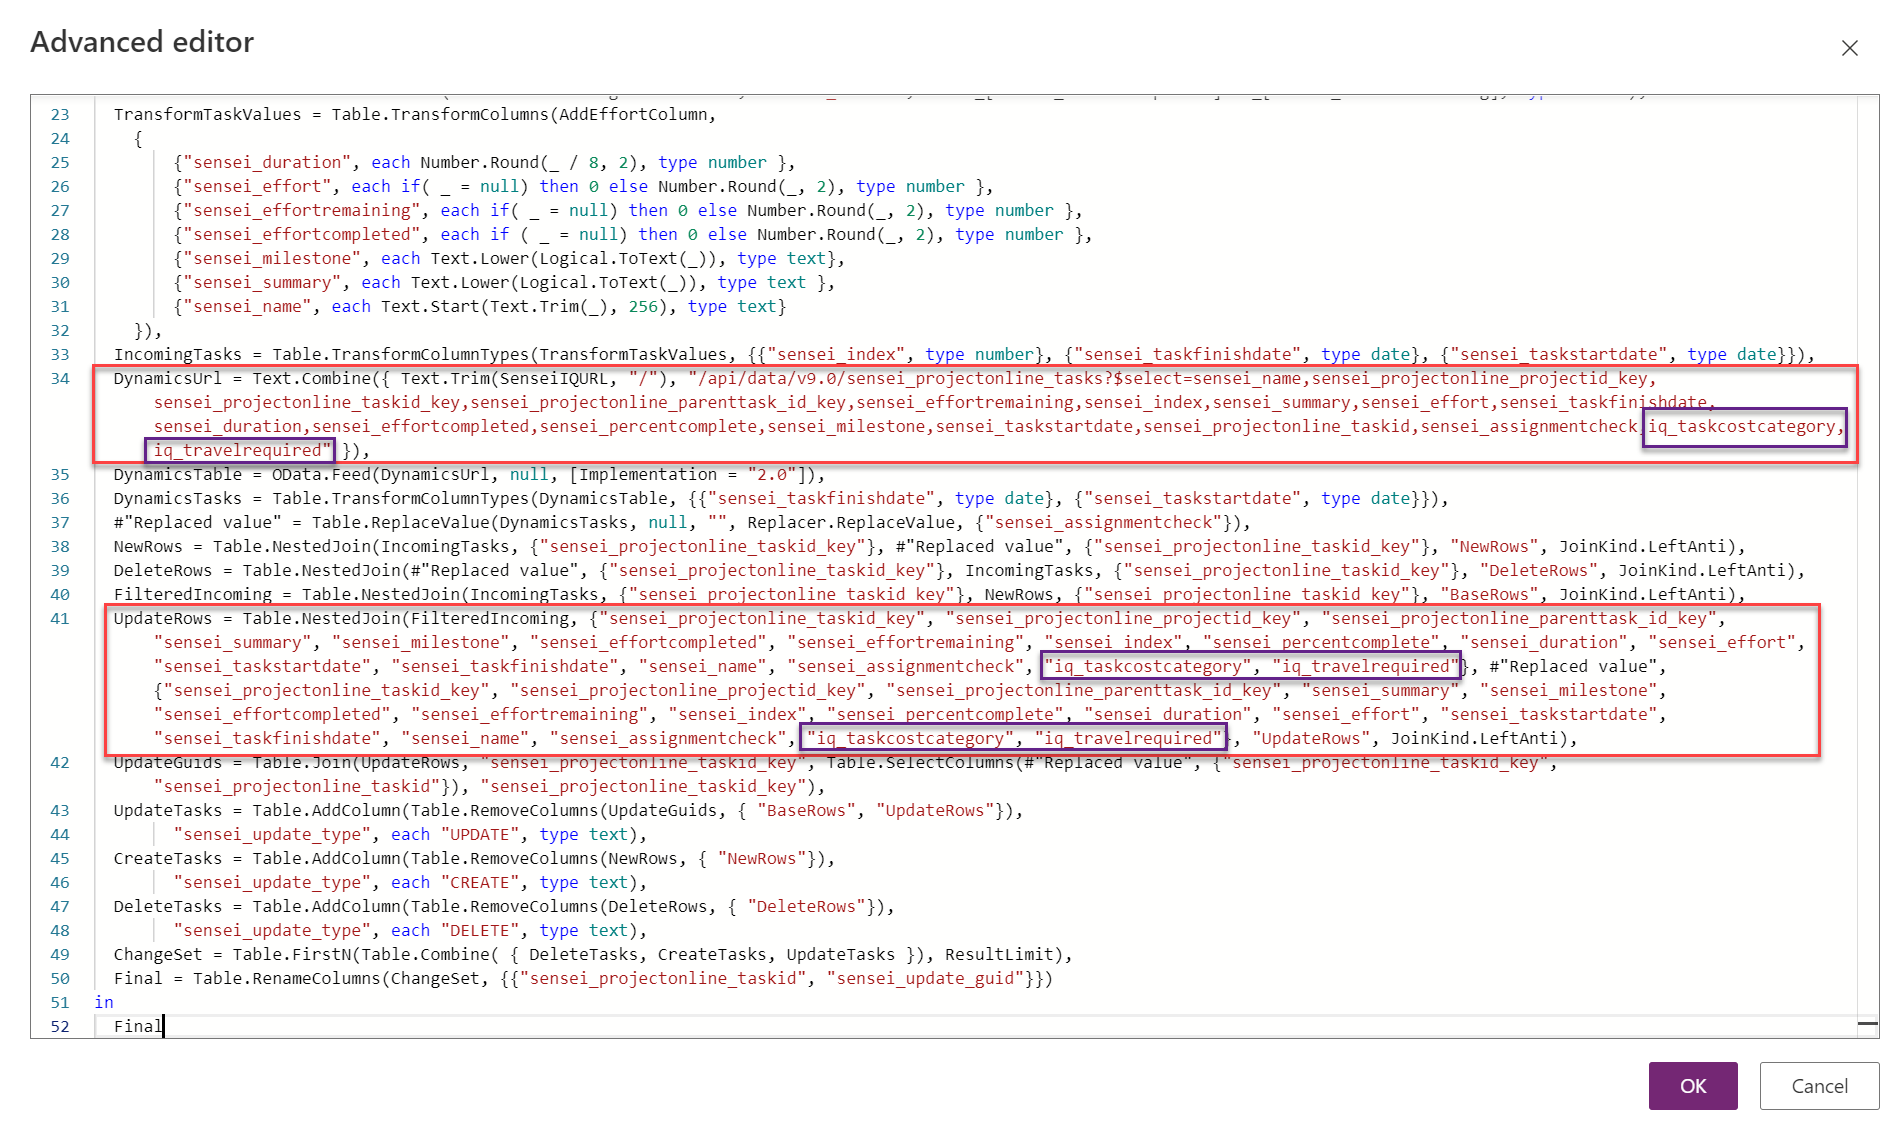
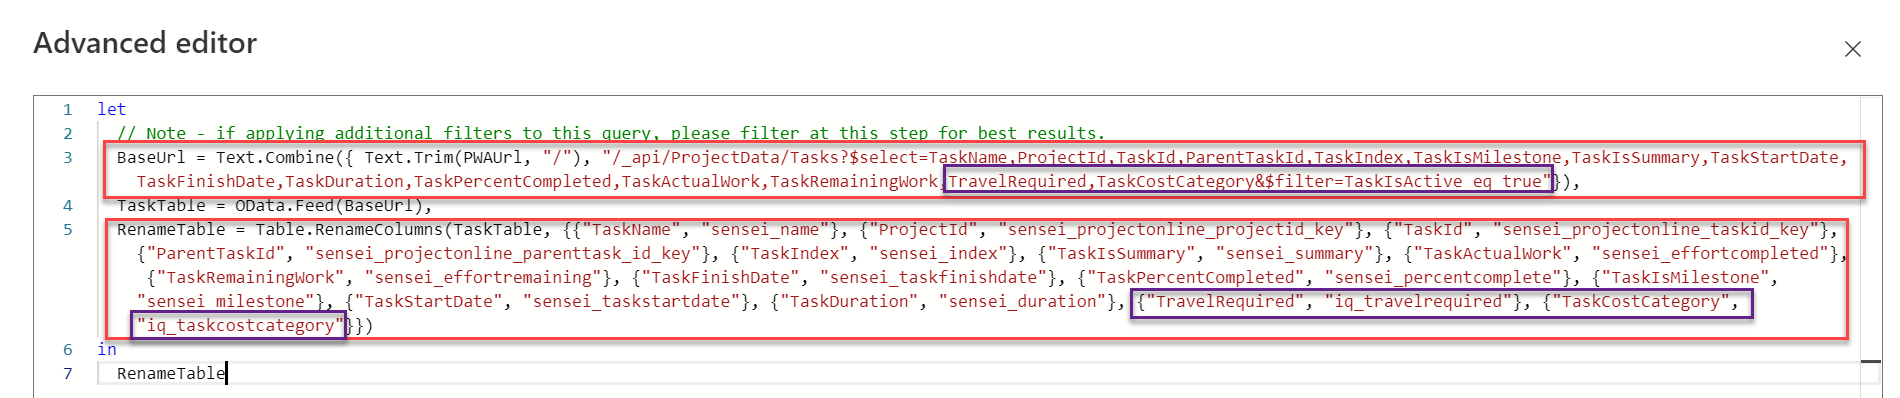
- Modify the Project Online Task Sync dataflow template using the following guidance:
- for the "Tasks_Raw" query, open the advanced editor and alter the "BaseUrl" step to include your new field from the source system - note Project Online custom fields will be case sensitive and have no spaces or special characters (ex. "Task Category" would become "TaskCategory"). In the example below, we are adding two fields - "TravelRequired" and "TaskCostType". We are also showing a filter to remove inactive tasks from the query output.
- also in the "Tasks_Raw" query, update the "RenameTable" step to rename the field name from the source to the internal name of the column in the Sensei IQ tables.
- Continue modifying the queries:
- in the sensei_projectonline_task_delta query, open the advanced editor and for the "DynamicsUrl" step, ensure you add the column from the sensei_projectonline_task table.
- also in the sensei_projectonline_task_delta query, change the "UpdateRows" step to include the new field/column on both sides of the comparison, meaning, add the column in the first set of fields {}, and in the set of fields after the "Replaced Value" text {}.
- ensure that the field from the source query is then mapped to the column in the dataflow "Map Tables" screen, if the field was renamed correctly, you can using "Auto map".